My one son has lost 3 baby teeth so far and I think 1 made it under his pillow. He seems to think it's a bad thing to loose his teeth. We bought and read books to him about loosing teeth and talked to him about it and he has an older brother who's lost teeth and gotten money for it. So I don't understand why he threw his latest lost tooth in the trash and didn't even tell us he had lost it. It wasn't until my husband noticed and asked when he had lost it. I didn't know either but I had remembered him throwing something away at breakfast the other morning saying "eeewww, something hard." When we asked him when he lost his tooth he burst into tears saying it was at breakfast the other morning. We told him it's not a bad thing and he could leave a note for the tooth fairy, but he didn't want to do that either.
So I was thinking maybe he's afraid of the tooth fairy coming in his room and going under his pillow. And I thought I'd make him a special pillow he could put his lost tooth in and he can set it next to his bed, on his bed or next to his door if he wanted. Whatever the reason for him not being excited about loosing teeth and throwing them away... hopefully a cute monster pillow will help!
I looked on Pinterest and wasn't 100% in love with any of them, so I drew up my own. I had some 16" pillow forms in the attic I got out and thought I would use one of them. I also just used some fabric I already had. I used felt for the eyes and teeth and that minky stuff (I think that's what people call it) for the horns and the back.
For the teeth I left one side open for a pocket to put a tooth and where the Tooth Fairy can leave the money.

I like multi functional things. If the pillow was just for teeth then soon he'll be done with it. I wanted it to also be for other stuff and get more use out if. So for the mouth I put a zipper and I overlapped the bottom fabric to cover the teeth so it would be softer if the face part is laid against. I sewed another fabric to the top piece to create a big pocket, the size of the pillow. You can put books or whatever you'd like in there.

I scanned in my drawing and then touched it up a bit. When I would do my own quilts, I drew up those as well, colored them in and wrote measurements. I guess I'm a bit of a nerd, I have to draw out my plans or use ones with measurements and stuff already. But it seems I often change plans of someones else's too. In junior high I took a mechanical drawing class and I loved it! I felt like I was back in that class drawing the teeth, going over 1.5" and up 5"... LOL! It was fun, maybe that's why I drew out a lot of my own quilt designs too, I enjoy it. Anyway here is my drawing after I touched it up in Photoshop...

I also made a pattern for the eyes, teeth and horns. Hopefully you can right click it, save it to your computer and then print it out. You cannot print it with a border if you want it as big as I did mine. The patterns go right to the edge of the paper. For the horns I used the teeth pattern, but put about a 1/2" border around it. Using your cutting ruler and mat, put the half inch line of your ruler on the edge of your pattern and cut. Hmmm... sorry maybe I should have taken a picture of that.

What you'll need...
You will need two 17" squares one for the back piece (I use that soft minky stuff) and one for the piece you'll put under the top to make the big pocket. So you could just use a fat quarter for these pieces.
For the face you'll need to cut 17"x 12.5"
For the mouth piece you'll need to cut 17" x 7" (I cut it 17" x 7.5" and ended up trimming 1/2" off, always better to be safe then sorry.)
For the face and mouth pieces you could also use fat quarters, or buy 1/2 yard cuts of fabric, depending on the direction of the pattern and how you want the direction of the pattern to go.
I had the felt on hand, but if you're going out to buy it you can just buy 1/4 of a yard, the biggest piece is 6" in diameter. Or you could use the felt sheets. Don't forget you will need to cut 2 of each on the pattern. Then another set of the triangles for the horns, but I did not use felt for the horns.
You don't have to use felt, I chose it because it didn't fray. But because I had the cheap felt, it pilled up after my son threw the pillow all around and played with it. I'm going to try the premium felt for the next one and see if that's better. You can use any fabric you want. If you don't want it to fray and don't want to use felt, you can use that minky stuff or fleece too.
A 16" pillow form.
You will need 2 zippers, a regular zipper for the mouth, I had to buy an 18" one. And a zipper for the pillow itself. I used an 12-14" invisible zipper. You can hand sew the pillow shut if you choose, but I find it easier to sew in a zipper. Also you can take it off for cleaning and repairs to the pillow.
And you will need all the basic sewing stuff... machine, pins, thread, etc.
Now how to make the Monster Pillow...
So first step... Cut those pieces from the fabric for your pillow as I mentioned above.
Then cut out your pattern pieces, I did mine on card stock so I can use them several times. I have 3 kids, so I figured I'd be making at least 3 of these.
Fold your felt in half so you can cut the 2 pieces you'll need at once. Pin your pattern piece to it and cut out your eyes and teeth.

Next sew your mouth zipper to the bottom of the face, follow the directions that come with the zipper. I had my fabric hanging off the zipper edge a little bit, about 1/8".

Then I folded and ironed the edge under (don't make your iron too hot! I had mine all the way up and melted my zipper a little), then I sewed the edge down to the zipper to prevent fraying. You can zig-zag the end if you wish, for me this was easy and looks nice.
 |
| After I folded in down and sewed it to prevent fraying. |
Then I folded it over (open) and top stitched it down to the zipper.

Here's the top stitch...
 |
| Remember I said I melted the zipper with the iron, see how it bows a little? That's from melting it, but it still works. |
Get your teeth pieces, pin them down and sew then on 2 sides to leave a pocket. I made sure mine cover the green, so they sort of connected to the teeth of the zipper, but don't get too close so you can still open and close the zipper.

I decided to sew a little on the side where the pocket would be, I thought it would make it a little sturdier or something. I sewed down 1.5" from the top and up an inch from the bottom. I marked where I wanted to stop with my Mark-B-Gone pen, I love it! You just get your mark wet and it disappears. Don't forget to back stitch when you stop and start.

Next pin and sew on your eye pieces. You can sew them all together first if you'd like, but I didn't, I sewed each one on to the face, starting with the biggest circle. I wanted my stitch to sort of be hidden, I'm not great at sewing circles, so I used a matching thread for each eye piece.

Almost done and looking good!
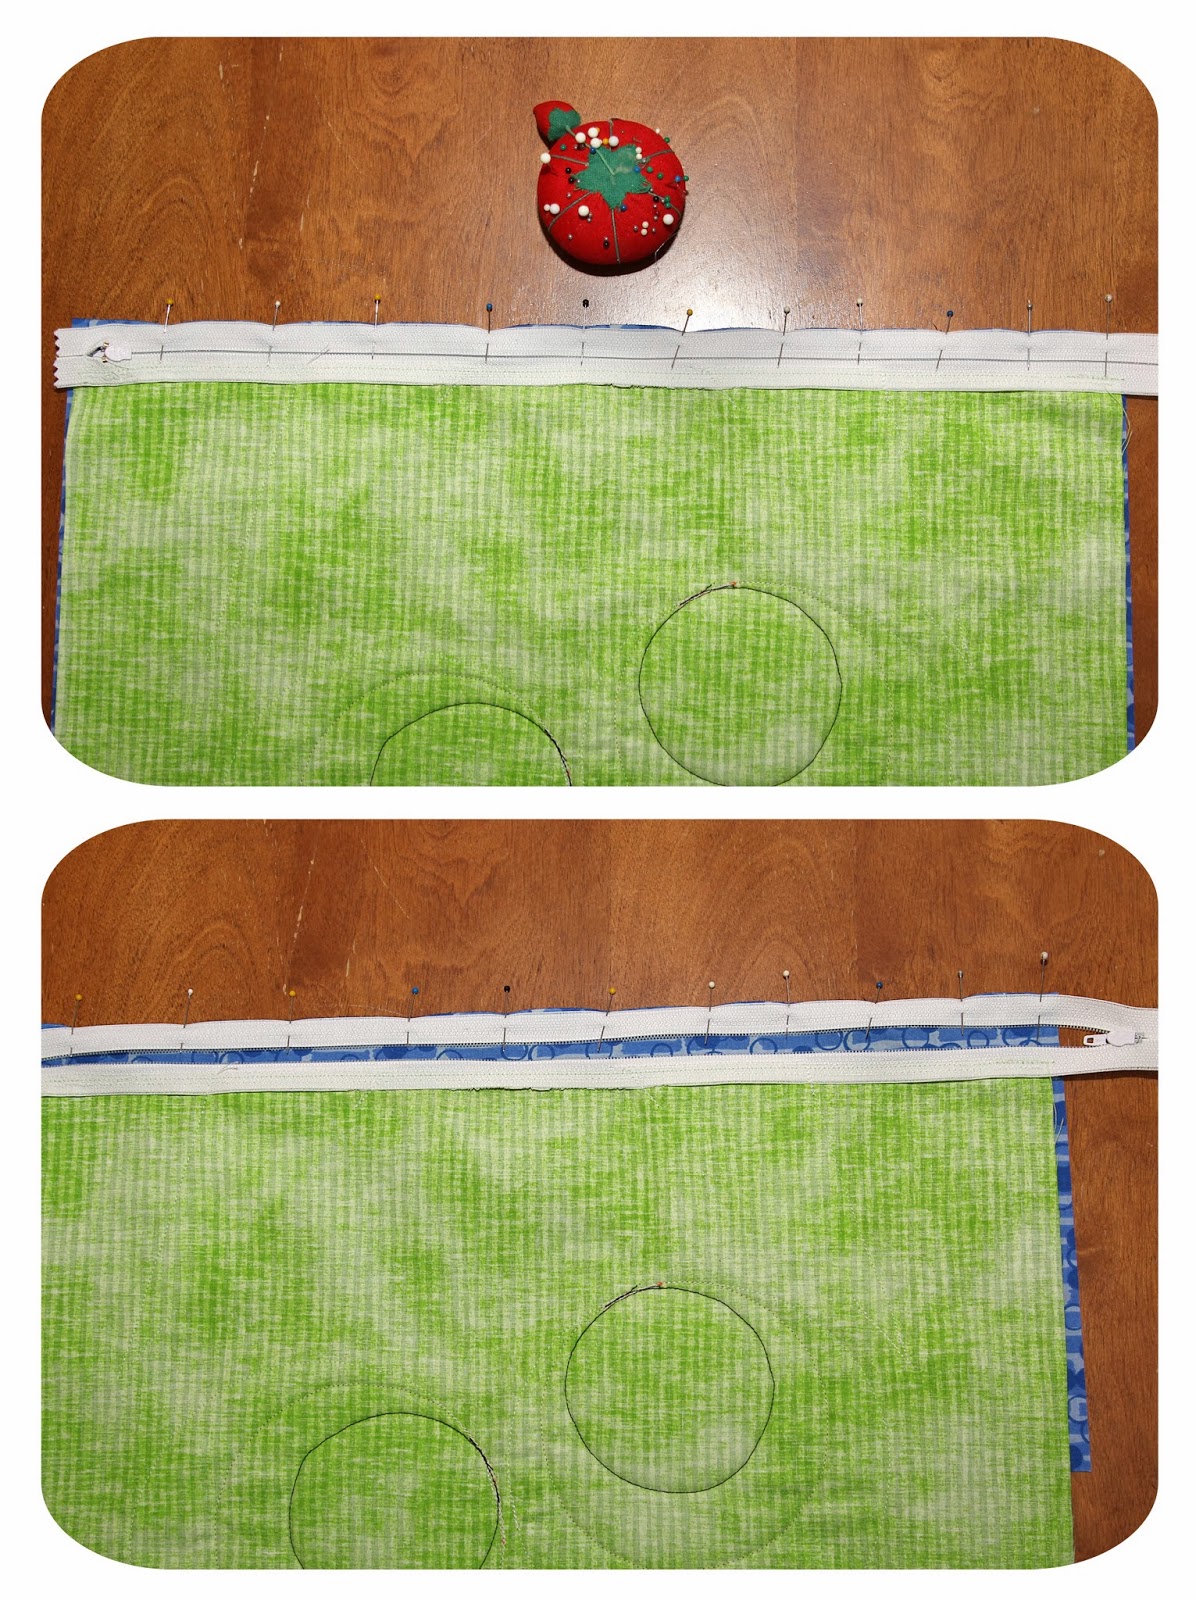
Next take your mouth piece fabric and iron a 1" fold at the top. Line the fold up with the zipper as in the picture below...

Open up the mouth piece of fabric and line it up with the green to make sure the sides will be straight.
Pin the zipper down, basically it will be like when you sewed the face piece to the zipper, you will have about 1/8" of an inch hanging over the edge of the zipper. So I guess you really don't have to line up the fold, it just will be lined up anyway.
Since my zipper was bigger then the fabric this part was easy... open the zipper so the pull is out of the way and sew the fabric to the zipper.
With the face (green) piece I folded the edge under and sewed it down to prevent frayed or I said you could zig-zag stitch it. You can do that here. I did not, because I left the salvage end there knowing it won't be seen and it won't fray.
Then fold the edge where you previously ironed in a fold and top stitch it down. This part may be tricky because you can't see the zipper, but you can use the left side as your guide on your sewing machine, so pay attention to where the left side (the fold) hits on your machine and use that for you guide.

Now your face is all sewn together. Get your pocket piece, the 17" square... put both face (right side) up, with the face of the monster on top, line them up and sew them together, sew with just under a 1/2" seam allowance. Sew all the way around, all 4 edges.
After I had lined mine up was when I trimmed the extra 1/2" off my mouth (the blue), remember I had cut it big knowing I may trim some off. The zipper adds a of bit of length to your face. It's always better to trim your edges when done then not have enough.

Look... you have a cute little pocket! Almost done! So exciting!!!

Make your horns... cut your horns out, sew 2 sides together with right sides facing, turn inside out, stuff, sew end shut.
I put mine 4 inches from the edges. Turn them down, opposite of how they will look when done, line them up with the edge of the face and sew them down. I go over them a couple of times to secure them good, knowing they will be pulled on and stuff.

Next get your zipper for the pillow and sew it on following the instructions it came with. Or skip this step if you are hand sewing it shut.

After your zipper is sewn on, with right sides facing sew the remainder of the pillow together with a 1/2" seam, make sure to leave your zipper most of the way opened so you have a hole to turn our pillow right side out. Again I went over where the horns are a few times, make sure your horns are tucked in when you sew the pillow together.

Clip your corners and zig-zag stitch all the way around to prevent fraying, especially if you put a zipper in which means it will opened.

Turn your pillow right side out, insert pillow form and zipper it shut... Ta-Da!!! All done!!!
So easy and cute!!!!

Happy sewing!!!
Here is the girl version I made for my daughter...
 I bought the premium felt for hers and it seems to not be pilling up like the cheaper felt did. I also used the minky stuff for the colored part of the eyes and added a little yarn hair.


Here is the girl version I made for my daughter...
 |
| She Loves it! |