Tuesday, December 24, 2013

Elf Fishing in Toilet

My boys have been dying all month for TJ to fish in the toilet!  They have even prayed for it when they'd say prayers.  So we Cloroxed the toilet good and I put rolled tape behind him because I did not want him falling in.  And we had him fish in the toilet.  The boys were thrilled!


Elf Eating Pancakes

TJ made himself some miniature pancakes...


Sunday, December 22, 2013

Teacher and Bus Driver Gift

I had made the teachers and bus driver Honey Roasted Almonds.  (Click here to go to the recipe.)  I put them in a baggie and in a container they can re-use.  I made tags that said "I'm nuts about  my teacher!"  They had told me it was pretty cute.

If you'd like to use the tags, just right click and save the image to your computer.


Honey Roasted Almonds

I found this recipe a few years ago and I just LOVE it!  It's super easy to make!  And I like to make it and hand it out at the holidays or anytime really.  Most of the people I have given these too I've found just love them too!

Honey Roasted Almonds

2 C whole almonds, skins on
1/4 C sugar
1/2 tsp. salt
2 TBL honey
2 TBL water
1tsp. almond or vegetable oil

Spread the almonds in a single layer in a shallow ungreased baking pan and place in a cold oven.  Bake at 350 degrees, stirring occasionally, until the internal color of nuts is tan (12-15 minutes).  Remove from oven and set aside.

Thoroughly mix the sugar and salt.  Stir together the honey, water and oil in a medium size pan and bring to a boil over medium heat.  Stir in the roasted almonds and continue to cook and stir until all the liquid has been absorbed by the nuts (about 5 minutes).  Immediately transfer to a medium bowl and sprinkle sugar mixture over all and toss.  Spread on  wax paper and cool.

(I mix the sugar and salt in a medium bowl and dump the nuts in it and the stir it up.)
I just love these and think they are so yummy!  I hope you enjoy them too!


It the first picture, in the blue bowl, that batch I accidentally used a TBL for the oil instead a tsp.  I didn't notice until my husband made another batch, the second picture in the off white bowl.  I asked him why he didn't just use the same measuring spoon for the oil that he used for the honey and water and he said "because it's a teaspoon of oil, not a tablespoon."  oh my!  I had given that 1st batch I made to the boys teachers and to the mom of the kid I baby sit.  I quickly sent a text to Tiff and she said she thought they tasted fine.  I had eaten some of that batch too and thought they tasted fine.  But the 2nd batch my husband made, with the right amount of oil, tasted better!  So I guess you can't really mess it up too much, because I messed it up and it still tasted good.

Thursday, December 19, 2013

Elf Zip Linning

TJ was zip lining on fishing string in the kitchen.  The boys loved this one!


Tuesday, December 17, 2013

Friday, December 13, 2013

Lego Manger

Since I have yet to get around to making the manger for the Nativity set, Jayden made a Lego one...


Pretty cute!

Wednesday, December 11, 2013

Elf on The Shelf Copies and Scans Himself

Our desk is in our family room, right below our stairs but it took the boys a long time to find the Elf this morning!  They sure thought it was funny that he copied and scanned himself!  I babysit my nieces and when they showed up they couldn't wait to show them what their Elf did!  And they took one of the copies into school to show their friends and teacher.


Tuesday, December 10, 2013

Elf Spells "Be Good"

The kids thought it funny that the Elf was eating some cereal and warned them to "be good."


My younger son did clean up the words and put the cheerios back in his bowl, but they never touched him.  I was really surprised he has stayed at every spot so far this year without being touched.

Sunday, December 8, 2013

Elf Holding Baby Jesus

The Elf was found holding baby Jesus today.  I think this was the only day that the Nativity wasn't re-arranged, because they didn't want to touch the Elf not he Shelf for fear he'd loose his magic.


Saturday, December 7, 2013

Elf Sleeping

This was another morning that it took the kids awhile to find their elf.  We keep our tissue box in the pantry cabinet so he was hiding and sleeping with a rubber duck and a bunny.  He folded up a tissue for a pillow and used one for a blanket.

Friday, December 6, 2013

Elf in the Fridge

It took the kids awhile to find their Elf this morning!  He was in the fridge drinking out of the syrup.

Thursday, December 5, 2013

Elf Draws on Pictures

The Elf used a white board marker and drew on my kids pictures.  They got a kick out of it, but then thought it was okay to do it themselves.  


Wednesday, December 4, 2013

The Elf Brought Christmas Socks

I was in the Dollar Tree and saw some Christmas socks for my kids.  So I wrapped them and had the Elf bring them.  They were super excited to get a present from the Elf!

Tuesday, December 3, 2013

Elf Tea Party

My daughter, who is 2 1/2, wasn't too happy the Elf was having a tea party with her dolls.  But I thought it was cute.  And it was another last minute set up.

Monday, December 2, 2013

Elf

A quick and easy one, I looked around and asked "what can I put him in?"  I saw the bird house my 7 year old son made and put him in it.  And they loved it!

Banana Split Ice Cream Cake

Wrong time of year for this, most likely, although I can eat ice cream cake all year round!
But as I said before I'm working on finally get my 2010 family blog book done and pulling out and re-uploading all my pics to my computer, so I came across this and thought I'd post it.

It's wonderfully amazing!

We had some very special people coming over for their birthdays and they requested an ice cream cake.  It just happened after I got their request I was surfing through some craft blogs and came across an easy recipe for banana split ice cream cake.  I was so excited!  It's super easy.  This is all you need...

Banana Split Ice Cream Cake

Ice cream sandwiches
Heath bits
Carmel and Hot Fudge topping
4 Bananas
Sliced Strawberries
Small can of crushed pineapple
1 container of whipped topping

You open all 12 ice cream sandwiches and lay them on the bottom of a 9x13 pan.  Slice the bananas and put them on top.  The use 1/2-1 cup of Hot Fudge and Carmel (each) and put on top.  Then layer the sliced strawberries.  Mix a small can of crushed pineapple including the juice with a container of whipped topping.  and then put that mixture on top.  Sprinkle a crushed butterfinger or heath bits on top.  And freeze for at least 4 hours.  and wa-la....
A very yummy ice cream cake!!!
Just a tip, leave it sit for a few minutes so you can actually bite into it.  I don't know about you, but I don't like my strawberries to be totally frozen, just a little.


DIY Wall Art Blocks

So here is another Wall Art I made using the 8x8 blocks I talked about in the previous post.  I just love this one too!!!!

 I really want to hang it on my brick above the fire place because that is where I have all my family pictures (of my sister's family, sister in-laws family, etc.)  But I don't know how to hang it without permanently putting a hole in the brick.  Does anyone know how I could do that? 
I ended up just hanging it in the living room and it looks fabulous!!! 

I did this the same way I did the 6-inch squares.  Please click here to read the instructions.

I took this picture, maybe not… hmmm… it was one like this.  Sorry, I'll have to pull out the DVD I burned the pictures too.  
and I divided it into 4 separate pictures, using photo shop, added text and printed the 4 separate pictures.  Then I used the instructions in my previous post to mod lodge them to the blocks of wood.  

This is what it looks like finished…


Okay, I didn't find this exact one I used, I must have put in a different folder other then from the date I took the picture, but I did find 2 different ones it looks like I had considered using here they are…

A1

B1

C1

D1

Another set...
A2

B2

C2

D2
 Here is the second set all together...

DIY Cheap, Cute Wall Art

I am finally working on my blog book form 2010!  I have 3 years to get done! Hoping to catch up!  I had lost a lot pictures and the work I did start on the 2010 blog book do to computer viruses, twice!  Then I had a baby girl and finally bought an iMac and now that my girl is older I'm playing catch up.  I do so LOVE our family blog books!  It's our family journals complete with pictures!!!  We look at them a lot!

In working on them I have to pull out the DVD's and upload my pictures again because I've since deleted the pictures from the blog to create room for the new posts, because i'm too cheap to pay for storage, but I may just pay the few dollars now.  Another place to have a back up of my pictures!  So in doing so I finally pulled out the pictures for this awesome craft I did way back on August 1, 2010!  I plan to finally make some for my mom for Christmas this year.  I can't believe it was over 3 years ago!
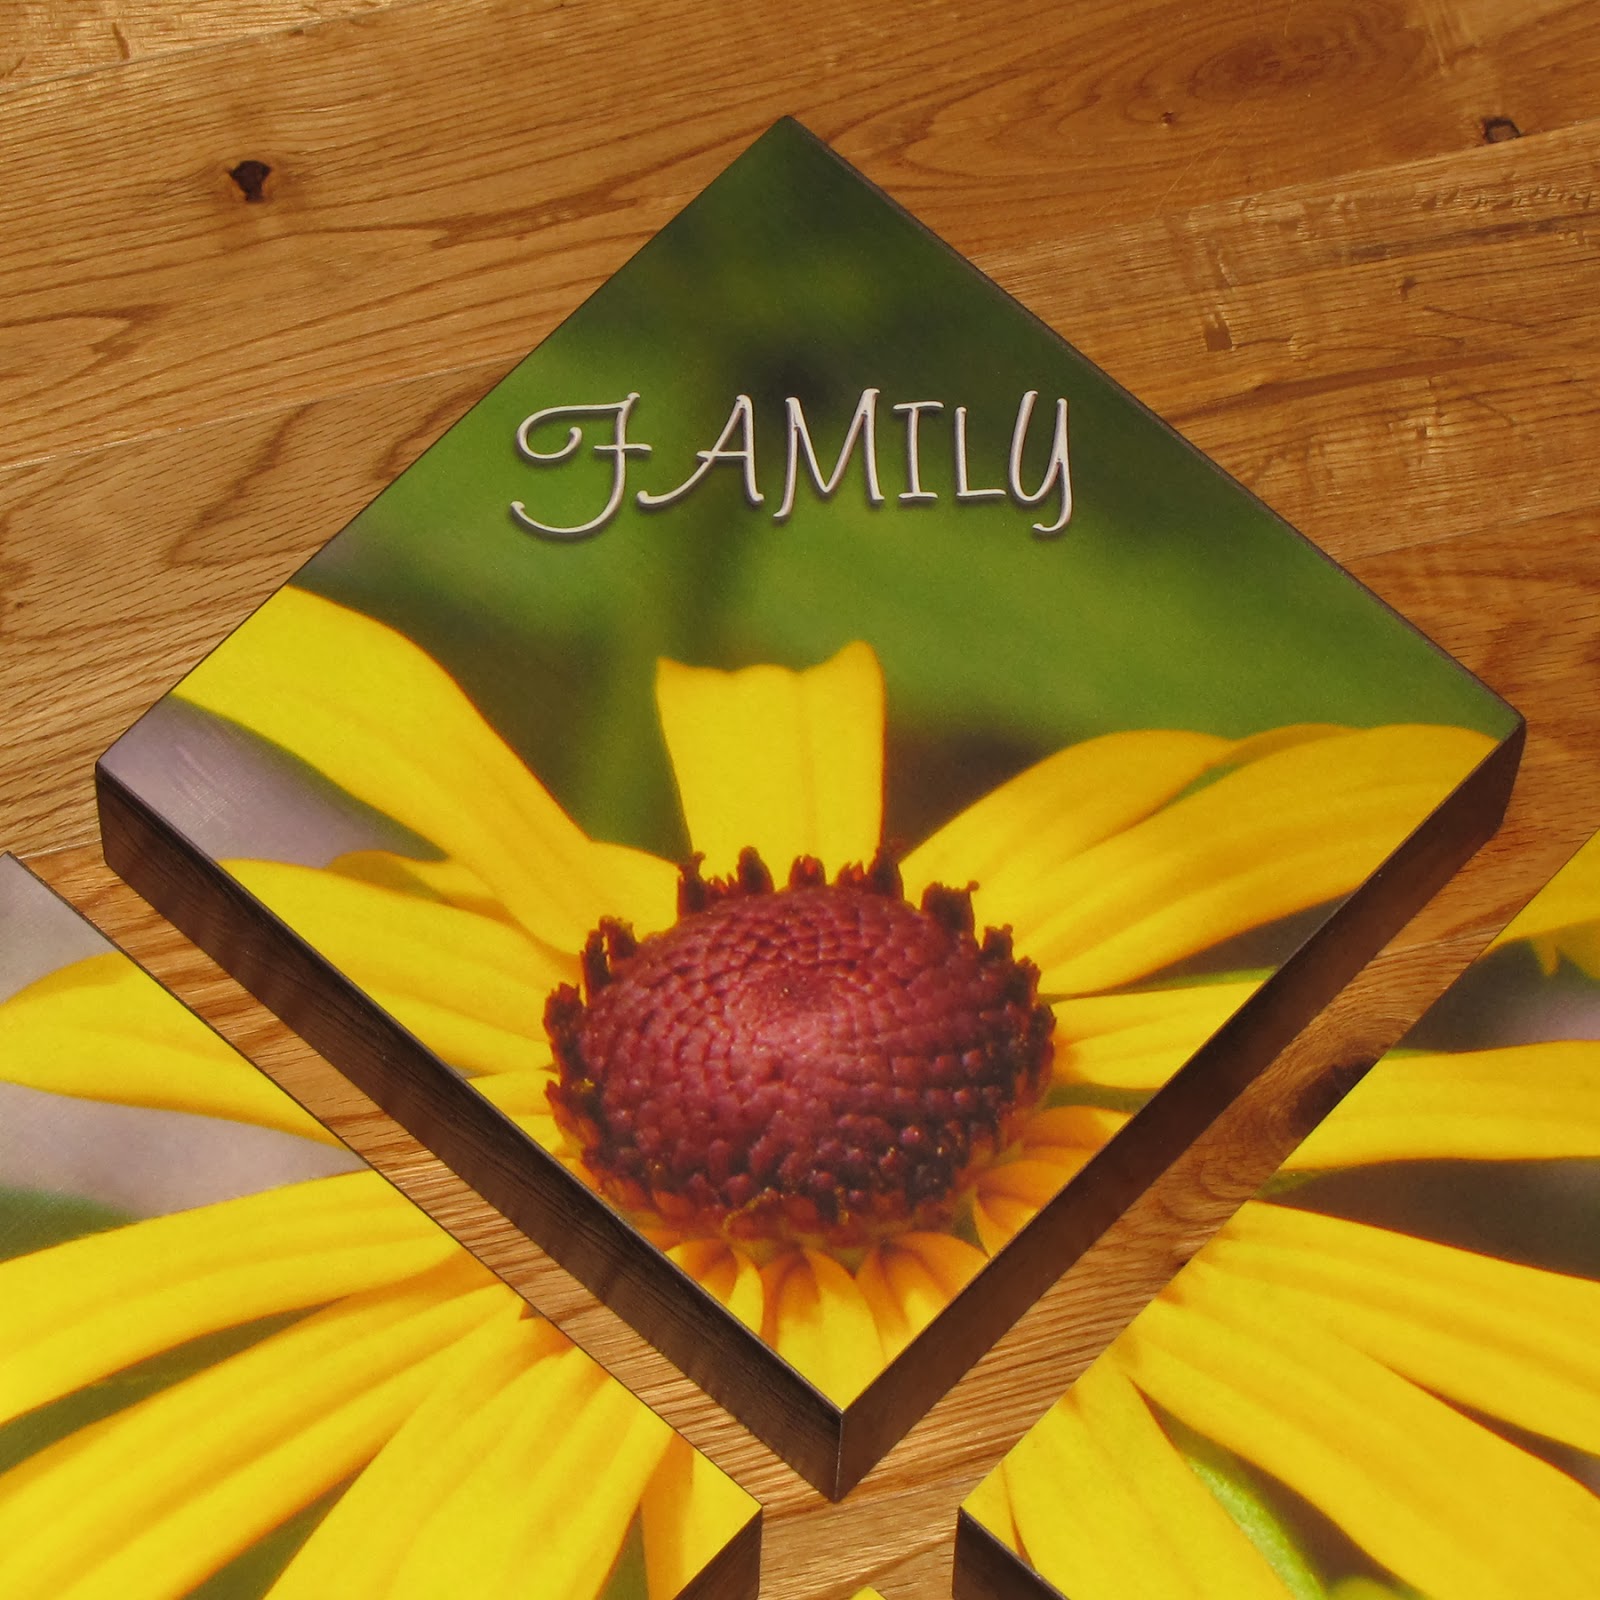
So here it is...

I LOVE crafts!  I just don't have too much time to do them anymore.  A little less than a month ago I went to a craft blog I have book marked (and there should be a button for it on the side of my blog) and surfed around some more craft blogs for over 2 hours during nap time.  I found all these fun crafts I wanted to do!  I was so excited!  (That was before I joined Pinterest, now it's much easier to search for crafts and keep track of the ideas you find.)


I wanted to put "art" on my walls for a long time, I just couldn't justify spending $20+ on a painting or picture that I just didn't love, and for years I have not found one that I loved.  I have tons of pictures of my boys and family all over my walls, but I would like "art" too.  I have a lot of artsy pictures that I have taken but didn't know what to do with them, I didn't want to frame another picture on the walls, even if it wasn't people.  And I found an idea on one of the craft blogs, I actually saw the same idea on a few blogs so I can't give one person the credit.  And a similar idea is in the Family Circle magazine this month.

So here is what I did...
I went from this… 
(well the picture is an 8x8 and I used a 6x6, the 8x8 will be used for something else, and wait until you see that, it will be awesome!)

I bought my box at AC Moore, the 6x6 is around $3 and the 8x8 is around $5, but use the coupon and save a dollar two... a dollar saved is a dollar earned!  

I signed up for their coupons to be emailed to me.  I printed 2 coupons and did 2 separate purchases back to back, each with a box and each using a coupon, they didn't say anything.  You can also go to their website to print the coupons.  Or when you're at the store tell them you forgot your coupon and they'll scan one for you!

Here is what not to do…

This is what I did first, the picture above.

I adhered the picture with a spray adhesive, let it dry and then mod podged over it and it bubbled!  

This is what I read on a couple of blogs to do.  

YIKES!  Luckily I could peel it off and start over... phew!!!!

So this is what I used the second time around...

I spray painted the sides and top edges of the box, 3 times to get the look I wanted.  I printed the picture myself, I took this picture myself too, in the Outer Banks last summer.  I just love the picture and wanted something to do with it, so I was way excited to do this!

Then I put a thin layer of Mod Podge and put the picture lightly on top, since the squares aren't exactly the same I moved it around until it was where I wanted and used my fingers starting from the middle and pressing out to smooth the picture down.  Then I used my arms pressing firmly.  And just to make sure I wouldn't get bubbles, I put a white piece of paper over top (to protect the print) and then used the ruler to go over the picture.  And I let it dry for 20 minutes.  Or put a heavy book on top and let it sit over night!  But if it's small and you don't have time, at least 20 minutes, but maybe a little longer.

Then I put mod podge over it going one direction, you have to work quick or the mod podge will pick up the ink in the print.  I let that dry for 20 minutes and rinsed out the brush so I could use it again.

The brush wasn't totally dry after 20 minutes so I used another brush and mode podged in the other direction and ta-da…  

In this picture you can see the texture…

Today I did 2 others so I can have a set of 3.  However I discovered a spray, Clear Acrilic Sealer that you can first spray over the print so the ink won't run in the mod podge, but you should follow the directions and do about 3 coats.

Here are all 3 that hopefully will soon end up on my kitchen wall…  

I took all 3 pictures!  I just love them!

I can't wait until they are hung up!  The cool thing about the boxes is that you don't have to hang them, you can just set them on shelf if you wanted to.  What do you think?

I can't fine my original square of the red and yellow flower, I had added texture to the picture and it looked so cool!  I'd have to redo it at this point.  But I have the white flower and a 4x6 of the red flower, just no texture added to the background of the picture.  And I have some other flower pictures you may want to use.  I'll put them here in case you can right click and use them.  I'm not sure how the print quality is doing it that way, but hey, if you want to try go ahead…  They are all pictures I took...


Related Posts Plugin for WordPress, Blogger...