Wednesday, May 30, 2012

2 T-shirts Into a Shirt for Mom and Dress for Baby

I recently bought some cheap t-shirts for $2.99 each at a JC Penny Outlet near my house.  I have seen these t-shirt makeovers and have been waiting to find some cheap enough to try it.
So I made a shirt for myself and a dress for Mackenzie using 2 t-shirts.  I have some left over and was thinking of making some bloomers for the dress.
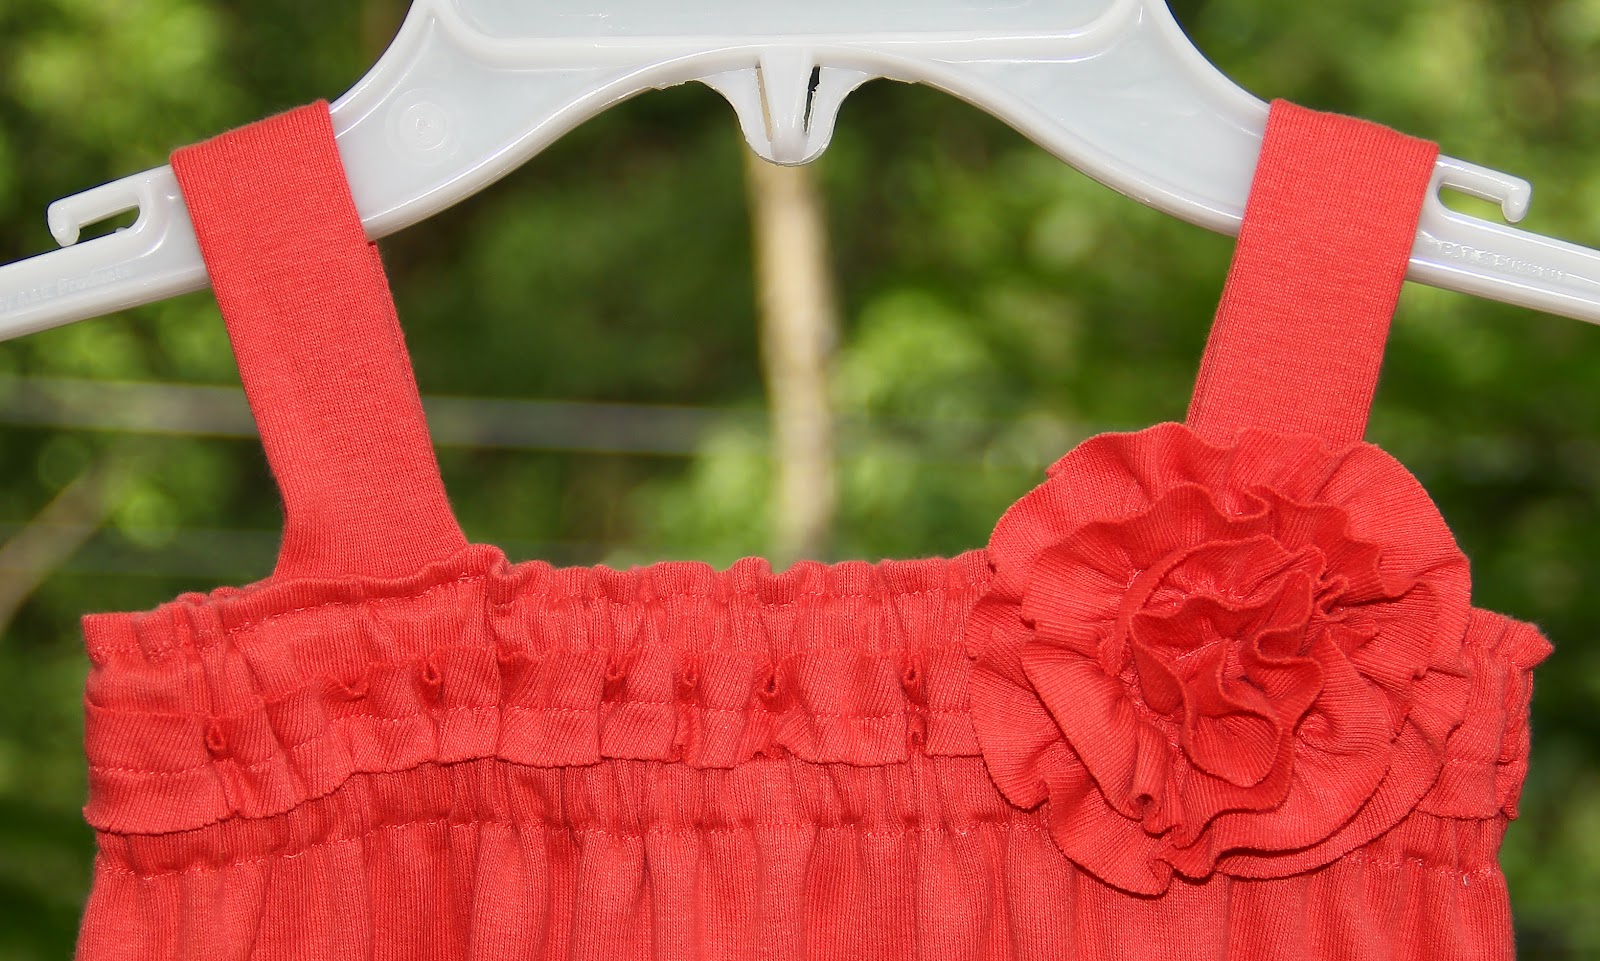
I also decided that I don't like the ruffles around the collar of my shirt.  I want to take them off and add another big flower above the smaller one on my shirt.
 I was too excited to get Mackenzie's dress done that I straps on before I put it on her and measured.  I should have waited, I want to move them in.  However, I did use a dress that I had to determine where they go, oh well!   Live and learn!
 She also wasn't her normally smiley self, but I didn't want to wait to take pictures.  Oh well, at least you can see what the dress looks like.


Remember I'm going to take the ruffle off the collar and add a big flower above the one that is there.

  I found the pattern for the dress on Pinterest and modified it a little.  Click here for the link to the pattern.
The t-shirt stuff is everywhere, so I won't bother repeating how to do it.
 

Friday, May 18, 2012

Award Ribbons

I'm on the preschool board and I volunteered to make the award ribbons for the graduating preschool class.  And here they are...
The teachers choose who gets what award, I just made them.

Monday, May 14, 2012

Bug Cupcakes

We made these cupcakes to take to Tanner's preschool for his birthday!  Aren't they so cute?  It's another idea I found on Pinterest.
And Jayden made these 4 for our family to eat...
Mackenzie loves to sit on the counter!!!  It's so funny how much she loves it! While I was whipping the icing she sat on the counter.


Birthday Boy Ribbons

I had seen the birthday boy ribbons that were in stores, they're really not that expensive but I thought I'd make my own anyway.  We were combining Tanner and Finns birthdays this year so I also made one for him to wear at the birthday party.  I think they turned out pretty cute...
I took some scrap fabric, cut a strip, like 5 inches wide or so and maybe 20 inches long.  I folded it in half, wrong sides together, sewed down close to the rough edges to hold it together.  Then I did a ruffle stitch to ruffle it.  It's so easy, all you do is set your sewing machine to the highest tension on mine it's a number 9 and the biggest stitch, on mine it's a 5.  And send it through, do NOT back stitch to start or stop. It should just ruffle as you sew!  Amazing!  But if you would like more or less of a ruffle, pull on one of the strings, you should just be able to see which one it is that you'll need to pull, if not... if the one you pull doesn't work, pull the other one.  While pulling the string you can adjust the ruffle.  Then put it in a circle shape, you made need to the cut if you think your circle is too big, but you will need to be very careful not to cut the ruffle stitch or your ruffles will come out!  It's not as complicated as it sounds.  Just cut the fabric without cutting the thread and using your seam ripper pull the threads out of the piece of fabric you're not using, but don't rip the threads.  Once you have it the way you want it, I tie a knot with my hands, just a basic knot, with the threads that were used to ruffle it, then snip the excess thread and sew your ends together and then zigzag the ends so it doesn't fray.
I hot glued it all together.
I hope all that makes sense.  But if you're a crafty person and know how to sew, you should really be able to figure it all out just by looking at the picture.

Saturday, May 5, 2012

Philly Temple Blocks

A few years ago I had come across some cute temple blocks on someone's blog and had wanted to do them with the young women because at the time I was in in young women's.  But we never did them.  So now that I am the Activity Days leader I decided to do them with the girls.  And now we know of the plans for a temple in Philadelphia and there is a picture of what it is supposed to look like.  So I took that picture, turned it black and white and added "I'm going there someday!" to it.  I had them printed at a 1 hour photo place and the girls mod podged them to the blocks and added ribbon.  Lora, the lady with me, and I sanded and spray painted the blocks ahead of time.  We use wood from the garage that we tore down at my house.
I forgot my camera on Wed. night so I don't have pictures of the ones that the girls made.  But we decided to do extra and give them to the girls that will be coming into Activity Days during the year.  So I took those home and finished them at home.  Unfortunately the pictures bubbled up.  I'm wondering if it was because we didn't have time to let the mod podge fully dry underneath the picture (you use the mod podge to glue the picture to the wood) before we mod podged over top.  And I had them next to the coal stove and they got really dry.  I don't know really know what happened, but I'm a little annoyed that it happened!
Anyhow, here are the 5 that I finished up at home, I just had to add the bows.  But I did do another coat of mod podge and it helped the bubbles a little, but not much.  You can see some of the bubbles in the picture.
I was going to upload the black and white picture of the Philly Temple for you to copy and use if you wanted to do this, but if you read a previous post, my computer died and that is where the picture was saved.  However, if you have any photo editing software, you can do it.  Download the picture from the church website, turn it black and white and add text.

Related Posts Plugin for WordPress, Blogger...